

If you send the same engagement letter, consent form or agreement more than twice, make it a template. The fields are already placed, so sending becomes: pick the template, type a name and email, send.
Siggy templates have one more trick. Documents from the Template gallery can be edited in Siggy itself: change the wording, add your clauses, drop in the signature and date boxes, and save it as yours. No Word round-trip.
- 1
Save an envelope as a template
- Build the envelope as usual: upload, add a recipient, place the fields.
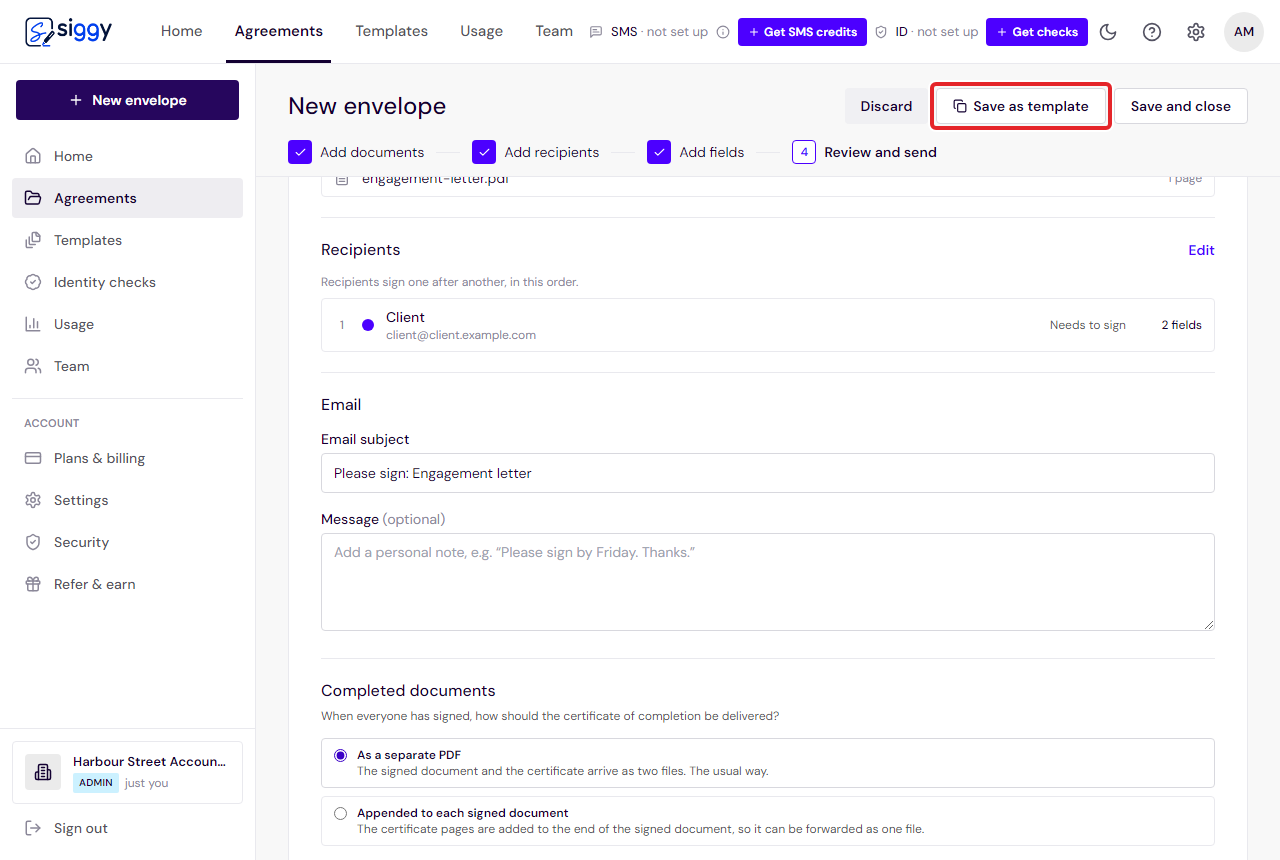
- On the Review and send step, click Save as template and give it a name.
- The recipient you added becomes a signing role (for example "Client"), filled in with a real person each time you send.
Save as template - 2
Send from a template
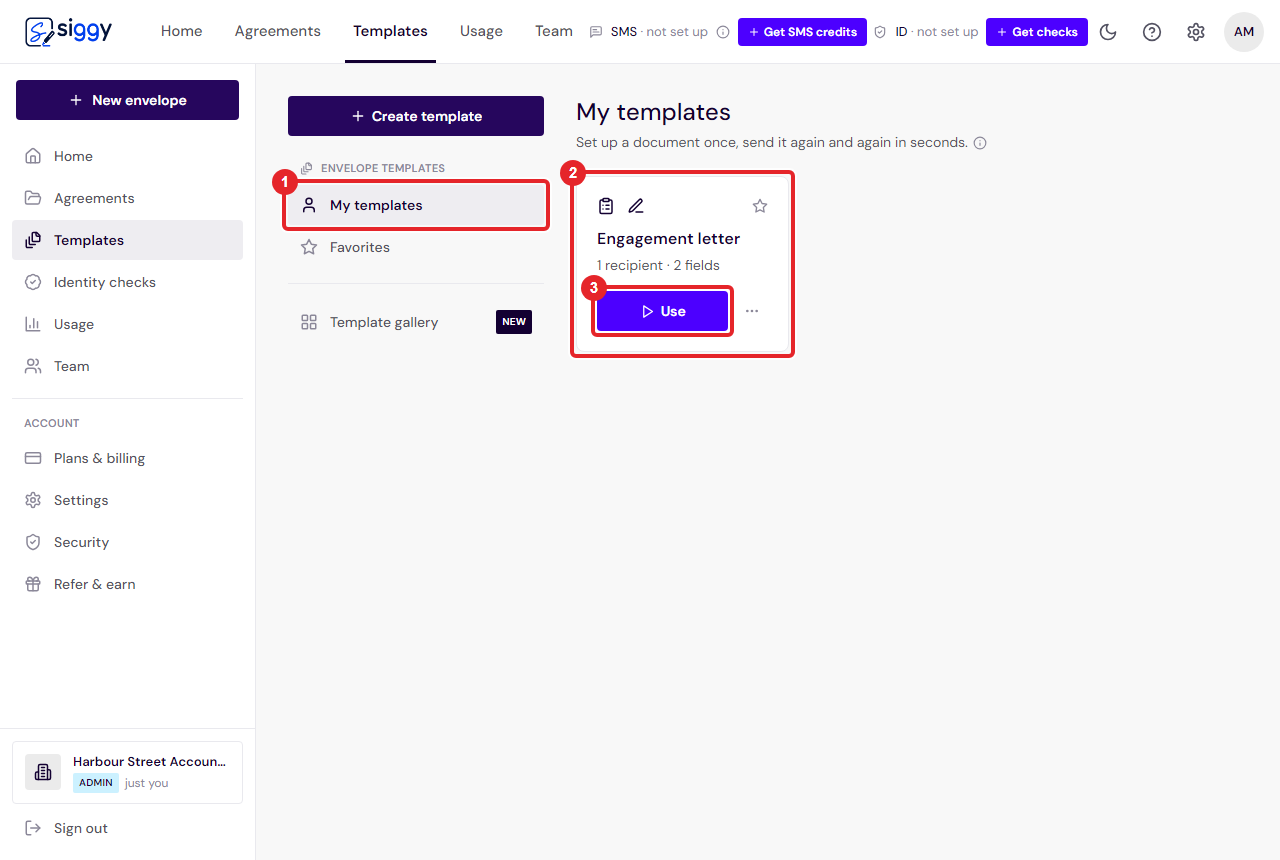
- Click Templates in the left-hand menu. Your templates are under My templates.
- Click Use on the one you want.
- Type the signer's name and email, and send. The fields are already on the page.
1My templates2Your template3Use - 3
Edit the wording of a template
- Open the Template gallery and pick a document, or click Edit wording on one of your templates that came from the gallery.
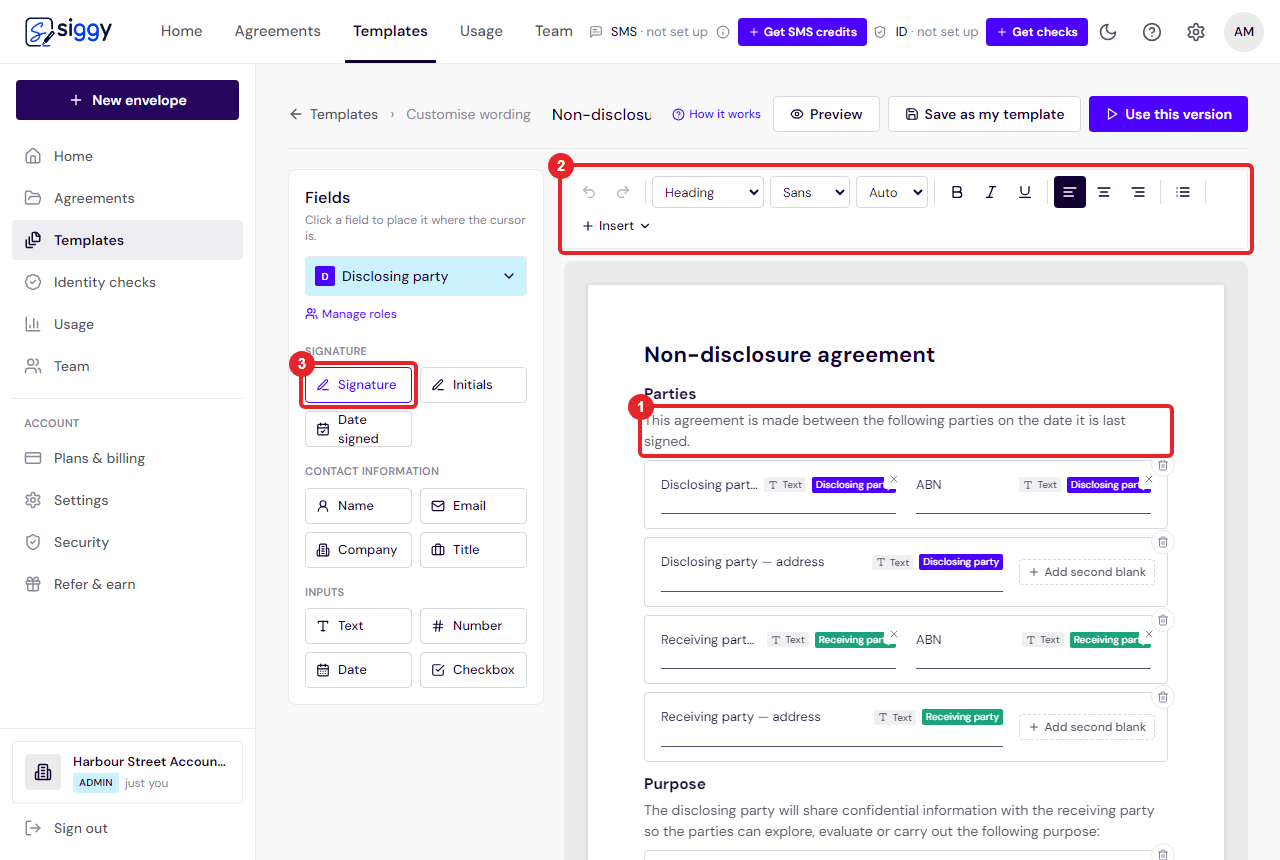
- It opens in an editor like a word processor. Change any sentence, add or delete clauses, use headings and lists.
- Click into the text where a signature or date belongs and insert the field there. It travels with the wording.
1Edit the text2Formatting3Insert a field - 4
Save it as yours
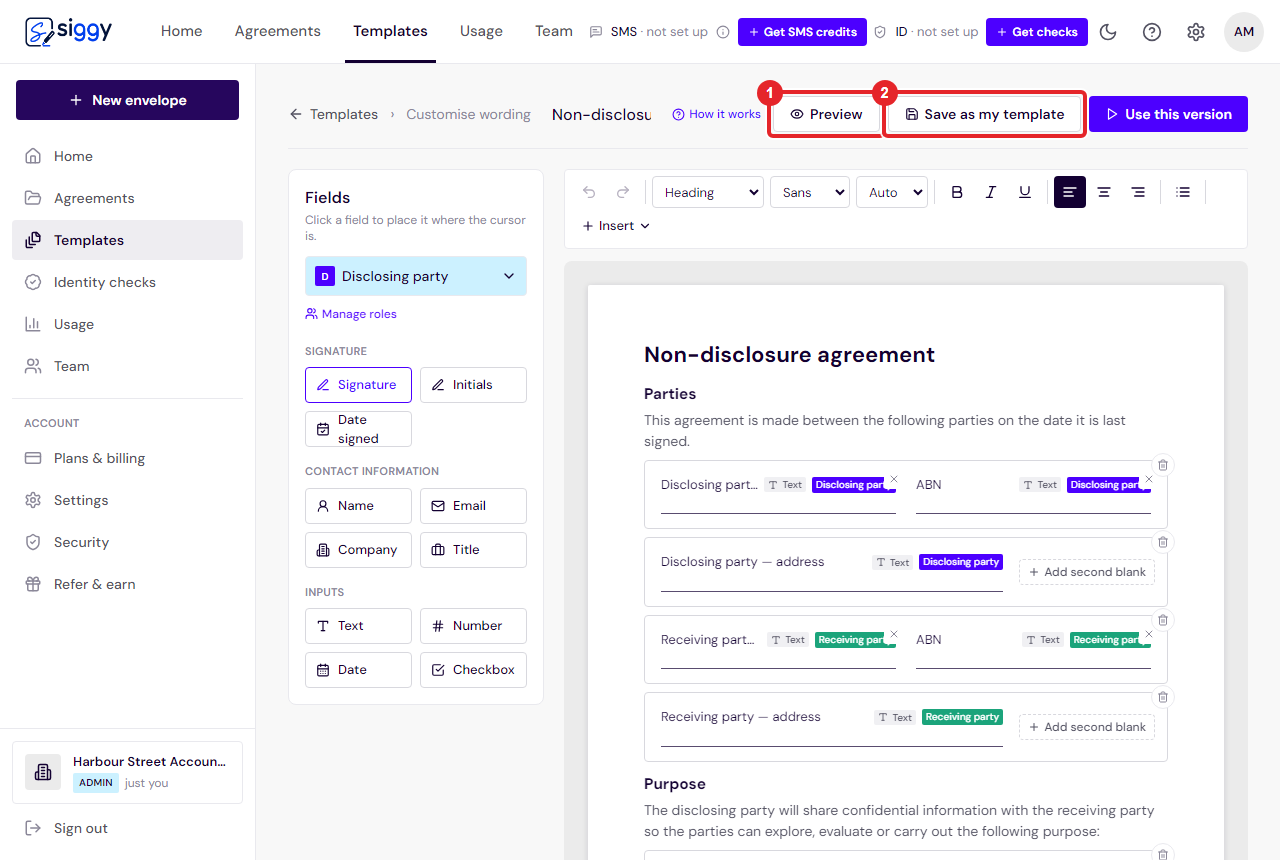
- Click Preview to see the finished page as your signer will.
- Click Save as my template. From now on it is under My templates with your wording and your fields.
- You can send it straight away from the same screen by adding a name and email.
1Preview2Save as my template
Good to know
- Templates are on Professional and above.
- A template with one signing role can be bulk sent: paste a list of names and emails and each line becomes its own envelope. See One envelope or many?.
Related guides
Custom fields: collect the details you need as they sign
Place a text box on the document, name it in your own words, and the signer is asked for exactly that. The answer lands in the signed PDF.
Open the guide ›One envelope or many? Who should go on an envelope
An envelope goes to everyone on it with the same documents, and completes only when they have all signed. Here is how to decide, and what to use instead when each person needs their own copy.
Open the guide ›Still stuck? Email [email protected] with the envelope's title and we will sort it with you.