

A signature is rarely the only thing you need. An address, a date of birth, a plan number, a vehicle registration. Rather than chase them afterwards, put a box on the document and the signer fills it in on the way to signing.
What makes it work is the label. You name the box in plain words, and that is what the signer sees. Not "Text", but "Participant's NDIS number".
- 1
Place a text box
- On the Add fields step, choose the signer in the Recipient list.
- Scroll the Fields panel to Text, click it, then click on the page where the answer should go. Drag the corner to make it wider if the answer will be long.
- Date signed, Name, Email and Checkbox work the same way. Date signed fills itself in.
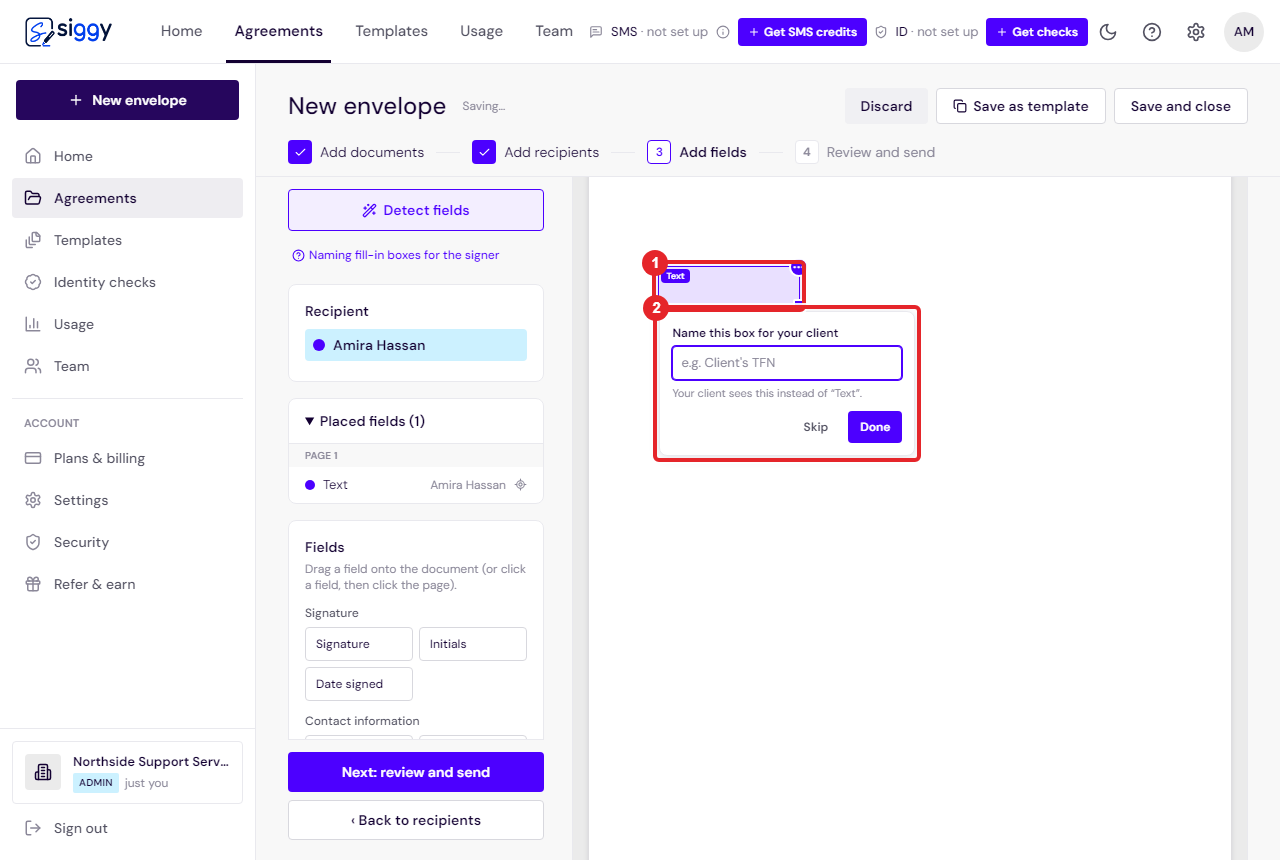
1The placed box2The naming prompt that opens - 2
Name it for the signer
- As soon as you place a text box, Siggy asks you to name this box for your client.
- Type what you are asking for, for example "Participant's NDIS number" or "Project address", and click Done.
- The name shows on the box, so you can see at a glance what each one asks. To change it later, click the small ⋯ on the box and edit Label for the signer.
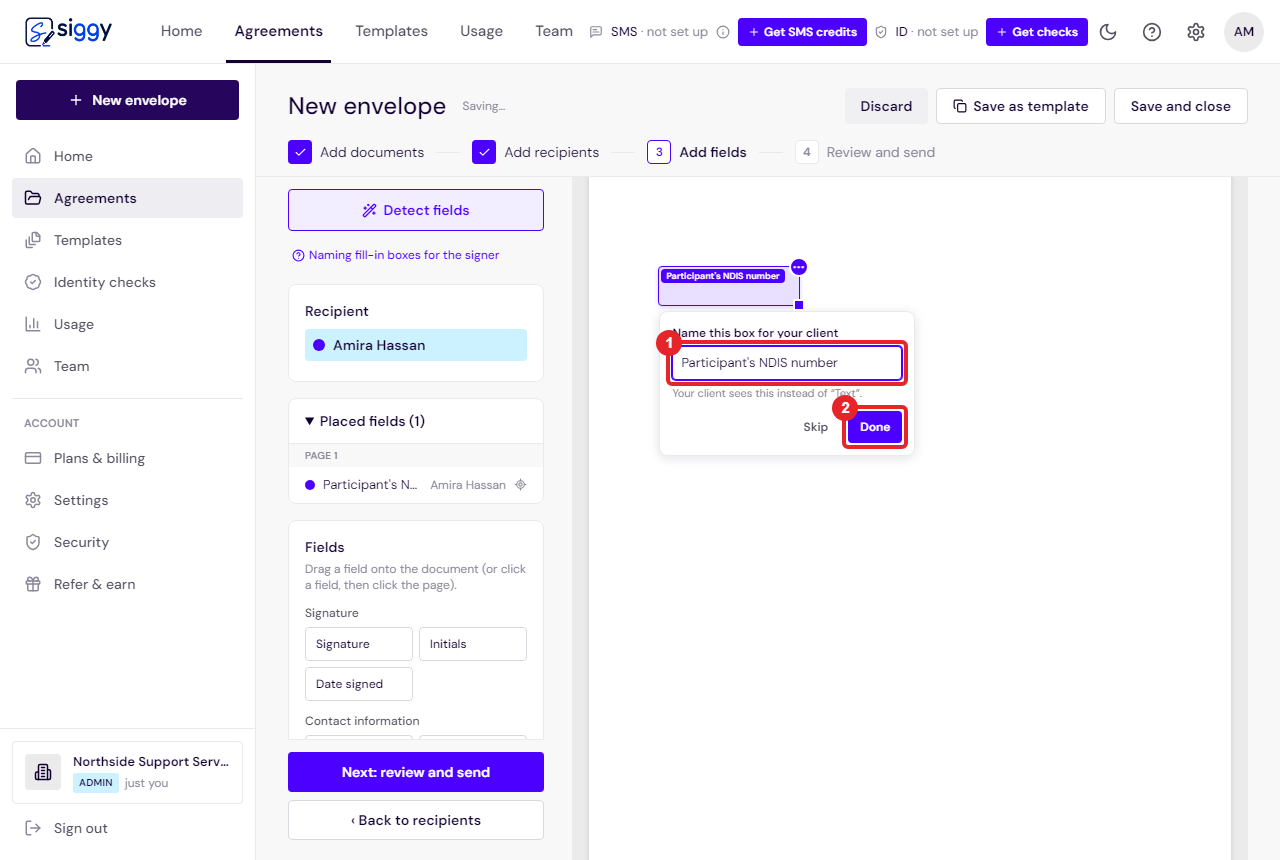
1Name this box for your client2Done - 3
What the signer sees
- On their signing page the box appears exactly where you put it, with your label inside it as the prompt.
- The guided Start and Next buttons take them to each box in turn, so nothing is missed.
- They cannot finish until every required box has an answer.
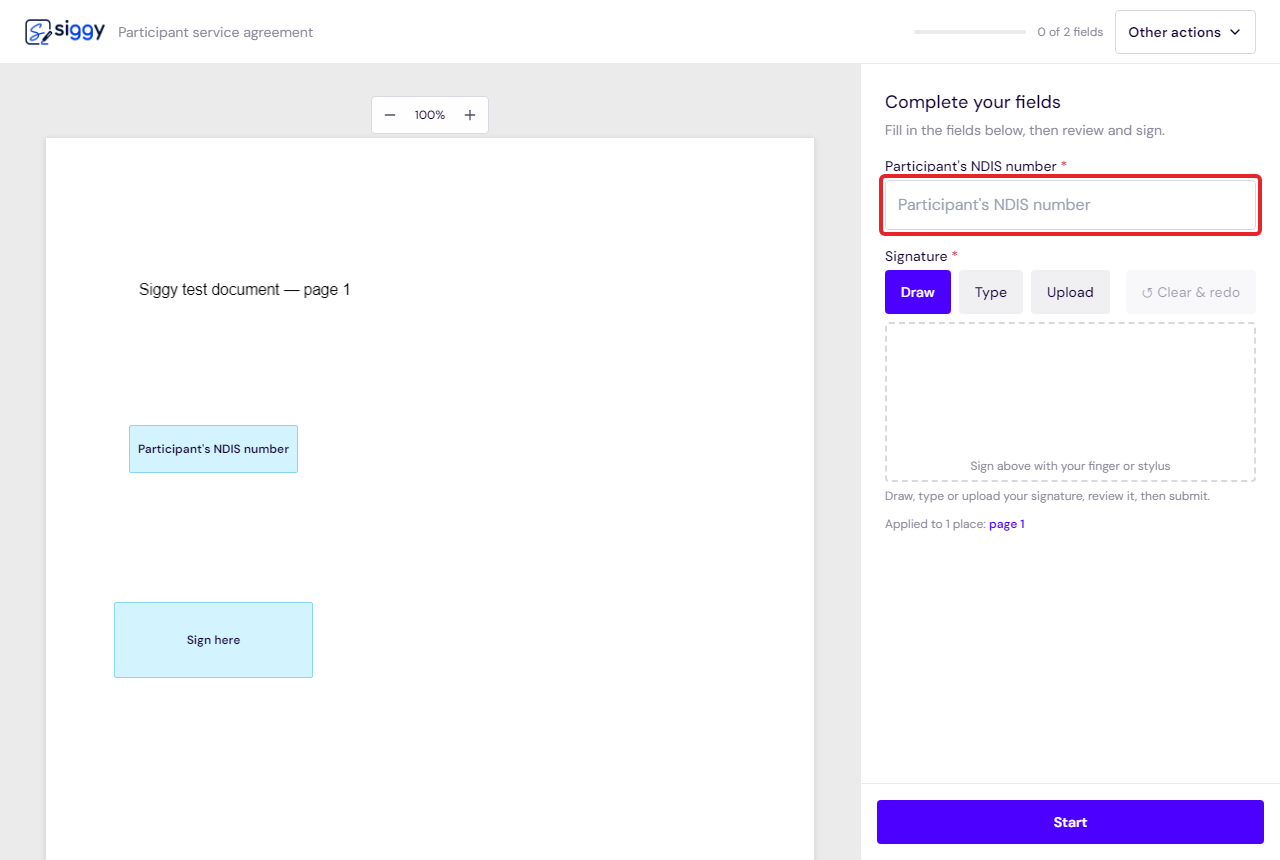
Your label, as the signer sees it - 4
Where the answer ends up
- What they type is printed into the signed PDF at that spot, under the same seal as the signatures.
- It is also in the certificate of completion, with the time it was entered.
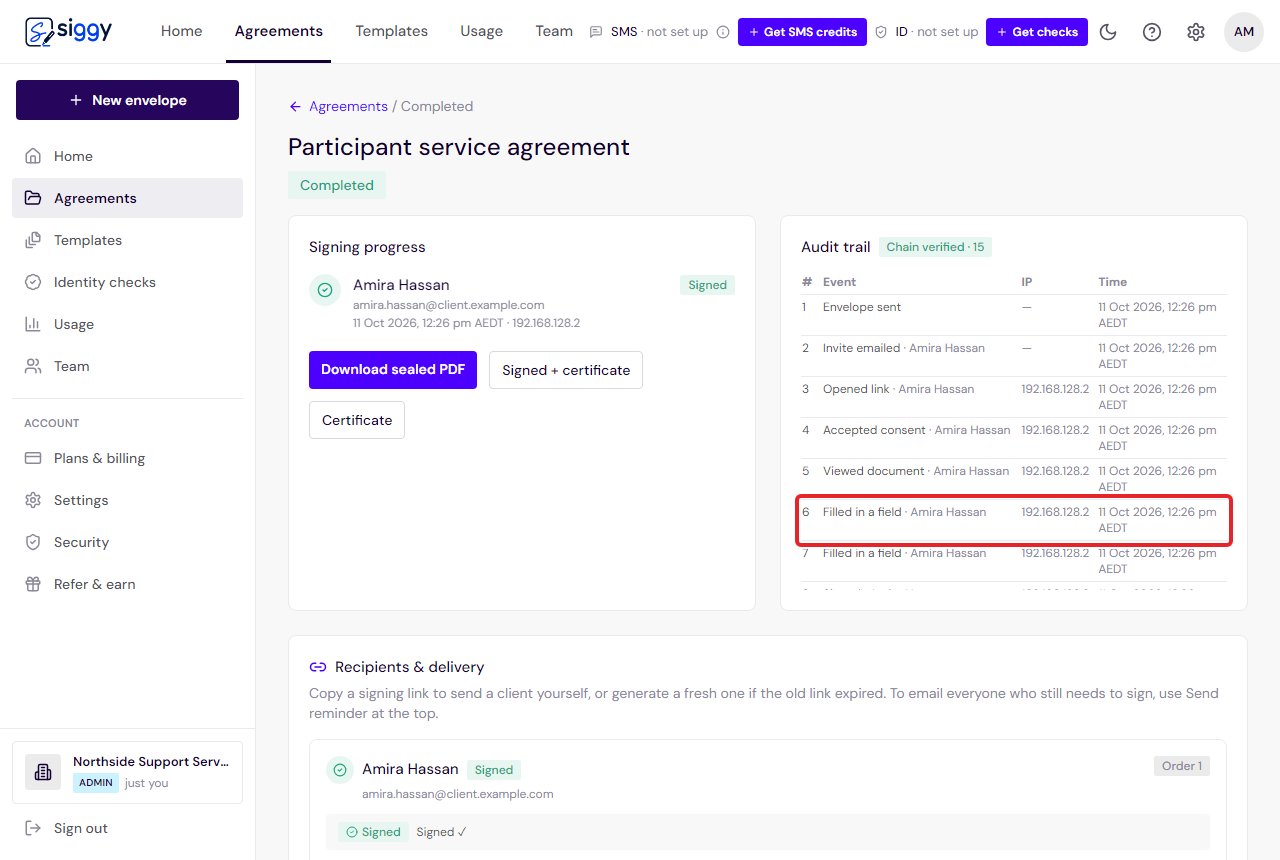
Filled in a field
Good to know
- Put the fields in a template once and every envelope from it asks the same questions. See Templates.
- Keep labels short and specific. "Date of birth (DD/MM/YYYY)" gets you a usable answer; "Details" does not.
Related guides
Templates: set up once, send in seconds
Save a document with its fields as a template, send it to a new client with just a name and email, and edit the wording of your templates right inside Siggy.
Open the guide ›Send your first envelope
Upload a document, add the people who need to sign, place the signature boxes and send. About two minutes, start to finish.
Open the guide ›Still stuck? Email [email protected] with the envelope's title and we will sort it with you.